Planning a paver patio, walkway, or driveway? Order too few pavers and you are making a second trip to the supplier. Order too many and you are paying for material that sits in your garage for months.
The good news: calculating how many pavers you need is straightforward once you know the math. This guide walks you through the formula, breaks down paver sizes, shows you exactly how much sand and gravel base you need, and links to a free calculator that does all the work.
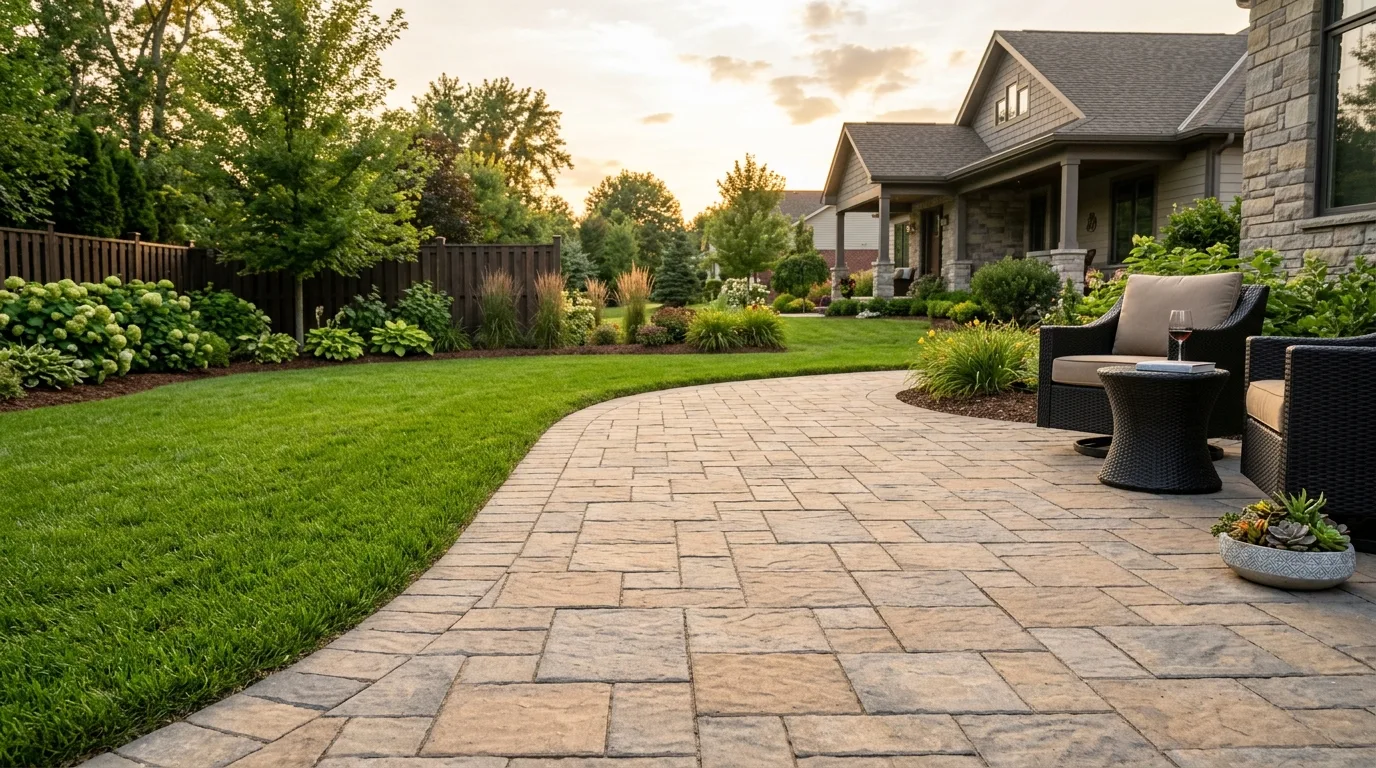
How to Measure for Pavers
Measure the length and width of the area in feet. Multiply them to get square footage. For irregular shapes, break them into rectangles and calculate each section separately.
| Shape | Formula | Example |
|---|---|---|
| Rectangle | Length x Width | 12 x 16 = 192 ft² |
| L-Shape | Split into 2 rectangles | (10x12) + (6x8) = 168 ft² |
| Circle | Pi x Radius² | 3.14 x 7² = 154 ft² |
| Trapezoid | ((Base1 + Base2) / 2) x Height | ((10 + 14) / 2) x 8 = 96 ft² |
Paver Coverage Chart
Different paver sizes cover different amounts of square footage. Here is the complete coverage chart for the most common residential paver sizes:
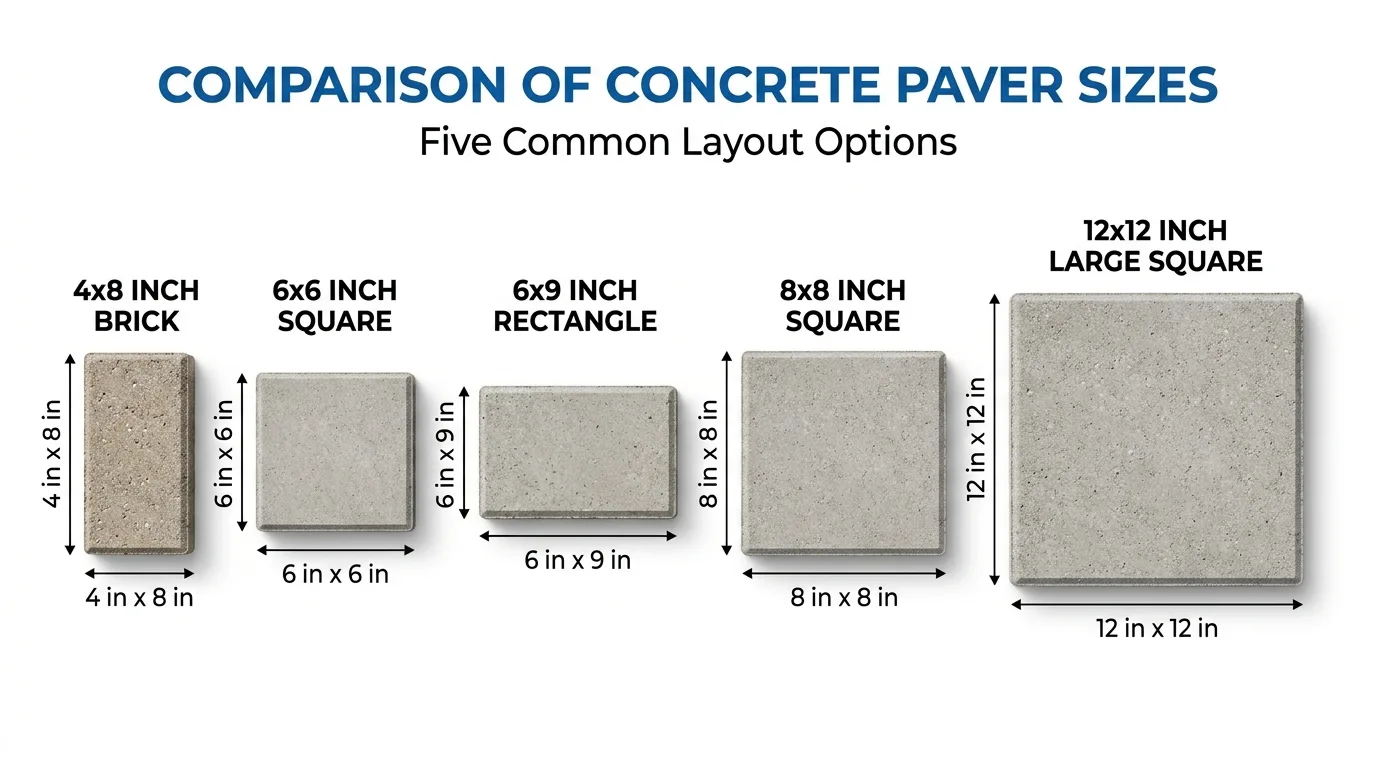
| Paver Size | Sq Ft per Paver | Pavers per ft² | 100 ft² Needs |
|---|---|---|---|
| 4 x 8 in | 0.222 ft² | 4.5 | 450 pavers |
| 6 x 6 in | 0.250 ft² | 4.0 | 400 pavers |
| 6 x 9 in | 0.375 ft² | 2.67 | 267 pavers |
| 8 x 8 in | 0.444 ft² | 2.25 | 225 pavers |
| 12 x 12 in | 1.000 ft² | 1.0 | 100 pavers |
The 4 x 8 inch brick is the most popular paver size in North America. It works for patios, walkways, and driveways, and it is available at every home improvement store.
Sand and Gravel Base Requirements
Every paver installation needs two base layers underneath: compacted gravel for structural support and sand bedding for leveling. Getting these right is more important than the pavers themselves.
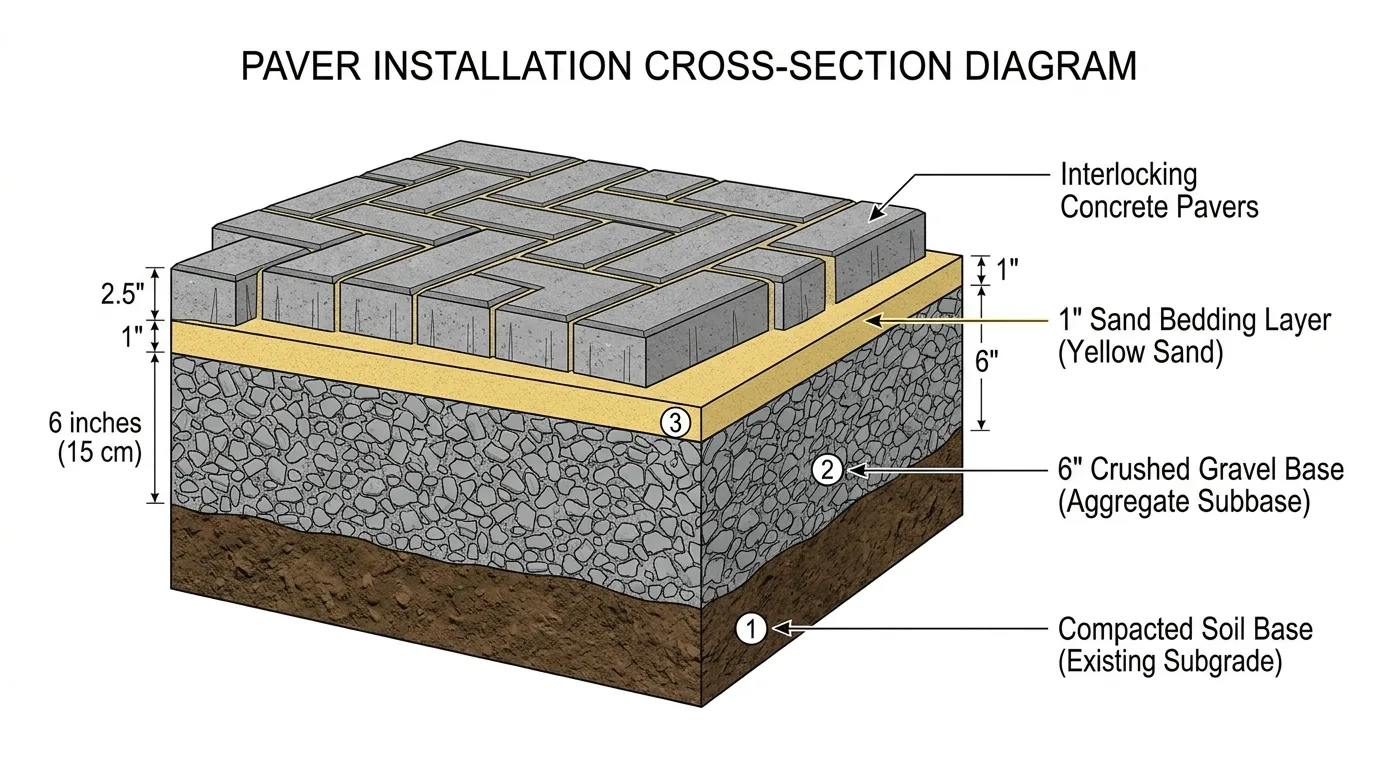
| Layer | Depth | Material | Purpose |
|---|---|---|---|
| Gravel base | 4-8 inches | Crushed stone / Class 5 | Structural support, drainage |
| Sand bedding | 1 inch | Concrete sand (ASTM C33) | Leveling surface for pavers |
| Pavers | 2-3 inches | Concrete, brick, or stone | Finished surface |
Gravel depth by project type:
- Walkways: 4 inches of compacted gravel
- Patios: 6 inches of compacted gravel
- Driveways: 8 inches of compacted gravel (use geotextile fabric on soft soil)
Use Our Free Paver Calculator
Enter your project dimensions, choose a paver size, and get instant estimates for pavers, sand, gravel base, and total cost.
Paver CalculatorPaver Materials Compared
Not all pavers are the same. The material you choose affects cost, durability, appearance, and how much maintenance your patio will need. Here is a detailed comparison of the four main paver types:
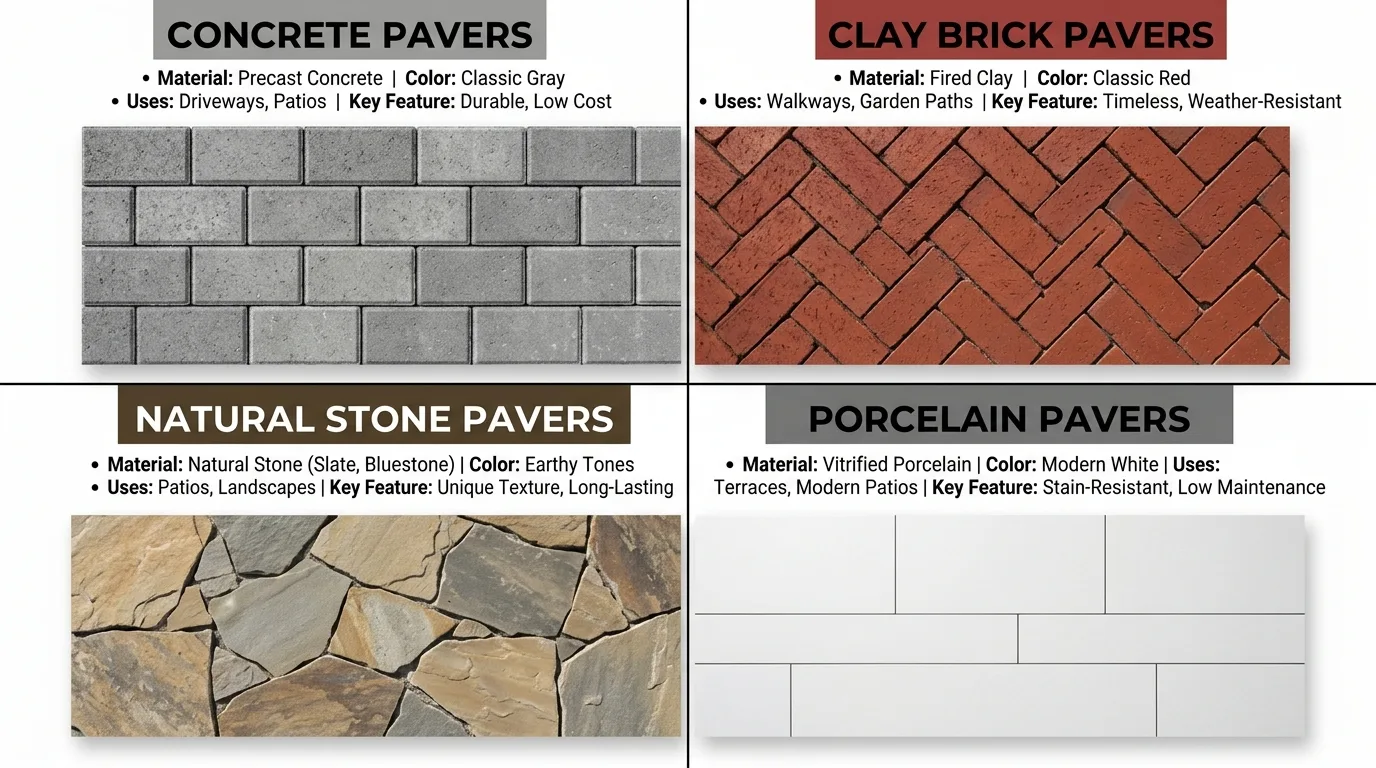
| Material | Cost / ft² | Lifespan | Durability | Maintenance | Best For |
|---|---|---|---|---|---|
| Concrete | $2-$6 | 25-50 yrs | Excellent | Low | Patios, driveways, walkways |
| Clay Brick | $4-$10 | 25-100 yrs | Very Good | Low | Walkways, patios, accents |
| Natural Stone | $8-$25 | 50-100+ yrs | Excellent | Medium | High-end patios, pool decks |
| Porcelain | $6-$15 | 30-50 yrs | Excellent | Very Low | Modern patios, pool areas |
Concrete Pavers
The most popular and affordable option. Made from poured concrete molded into shapes, concrete pavers come in hundreds of colors, textures, and sizes. They handle heavy traffic well and are available at every home improvement store. The color may fade over 10-15 years, but sealing can slow this process.
Clay Brick Pavers
Made from natural clay fired in a kiln, brick pavers have a classic look that concrete cannot perfectly replicate. They resist fading because the color goes through the entire paver. However, they are more brittle than concrete and can crack under heavy loads. Best for walkways and patios, not driveways with heavy trucks.
Natural Stone Pavers
The premium choice. Materials include flagstone, bluestone, travertine, slate, and granite. Each stone is unique in color and texture. Natural stone lasts the longest (50-100+ years) and adds significant property value. The downside: higher cost, heavier weight, and some stones (like travertine) are vulnerable to freeze-thaw damage in cold climates because water enters the pores and expands when frozen.
Porcelain Pavers
The newest category. Porcelain pavers are extremely dense, stain-resistant, and fade-proof. They work well around pools because they absorb less than 0.5% water. However, they require a perfectly flat base and specialized cutting tools. Not ideal for DIY installation.
How to Calculate Pavers for Irregular Shapes
Most patios are not perfect rectangles. Here is how to calculate paver quantities for common irregular shapes:
L-Shaped Patio
Split the L into two rectangles. Calculate each separately, then add the results.
Rectangle B: 6 ft x 10 ft = 60 ft²
Total: 96 + 60 = 156 ft²
Curved or Kidney-Shaped Patio
Place a garden hose on the ground to outline the shape. Measure the longest length and widest width. Treat it as a rectangle and add 10-15% extra for the curved edges.
Estimated area: 14 x 10 = 140 ft²
With 15% curve buffer: 140 x 1.15 = 161 ft²
Triangular Area
Measure the base and height, then use the triangle formula:
Example: (12 x 8) / 2 = 48 ft²
Circular Patio
Measure the radius (center to edge), then use the circle formula:
Example: 3.14 x 5² = 78.5 ft²
Polymeric Sand vs Regular Sand
The sand you sweep into paver joints matters. Here is the difference between regular joint sand and polymeric sand:
| Feature | Regular Sand | Polymeric Sand |
|---|---|---|
| Cost | $3-$5 per bag | $25-$40 per bag |
| Coverage | 50-75 ft² per bag | 25-50 ft² per bag |
| Weed Resistance | None | Excellent — hardens joints |
| Insect Resistance | None | Good — ants cannot dig through |
| Washout Resistance | Low — rain washes it out | High — stays in joints |
| Reapplication | Every 1-2 years | Every 5-10 years |
| Installation | Sweep and done | Sweep, mist with water, cure 24 hrs |
Polymeric sand is worth the extra cost. It hardens when activated with water, locking pavers in place and preventing weeds, ants, and washout. The upfront cost is higher, but you save money over time because you do not need to re-sand every year.
Common Paver Installation Mistakes
Avoid these mistakes to ensure your paver installation lasts decades:
Mistakes to Avoid
- Skip compacting the gravel base — This is the #1 cause of settling and uneven pavers. Compact every 2-inch lift.
- Use too much sand — More than 1 inch of sand bedding allows pavers to rock and shift. Stick to exactly 1 inch.
- Skip edge restraints — Without edge restraints, pavers will spread outward over time, creating gaps.
- Walk on fresh sand — Foot traffic on the screeded sand bed creates uneven spots. Work from the side.
- Forget to slope — A minimum 1% slope (⅛ inch per foot) away from structures prevents water pooling.
Best Practices
- Order 10% extra — Cuts and breakage happen. Extra pavers from the same batch ensure color matching.
- Use string lines — Keep rows straight by running string lines along the length and width.
- Check level frequently — Use a 6-foot level or straight board to check for high and low spots as you lay.
- Compact pavers after laying — Run the plate compactor over the finished surface to settle pavers into the sand.
- Wait 24 hours before use — Let polymeric sand cure and the installation settle before walking or driving on it.
Paver Maintenance Guide
Pavers are low maintenance, but a little care keeps them looking new for decades:
| Task | Frequency | How To |
|---|---|---|
| Sweeping | Weekly | Remove debris with a broom to prevent staining |
| Washing | Monthly | Rinse with garden hose or pressure washer (under 2,000 PSI) |
| Weed removal | As needed | Pull weeds by hand or use a paver-safe herbicide |
| Re-sanding joints | Every 1-2 years | Sweep polymeric or joint sand into gaps |
| Sealing | Every 2-3 years | Apply a paver sealer to protect against stains and UV |
| Stain treatment | As needed | Oil: dish soap + cat litter. Rust: lemon juice. Grease: degreaser |
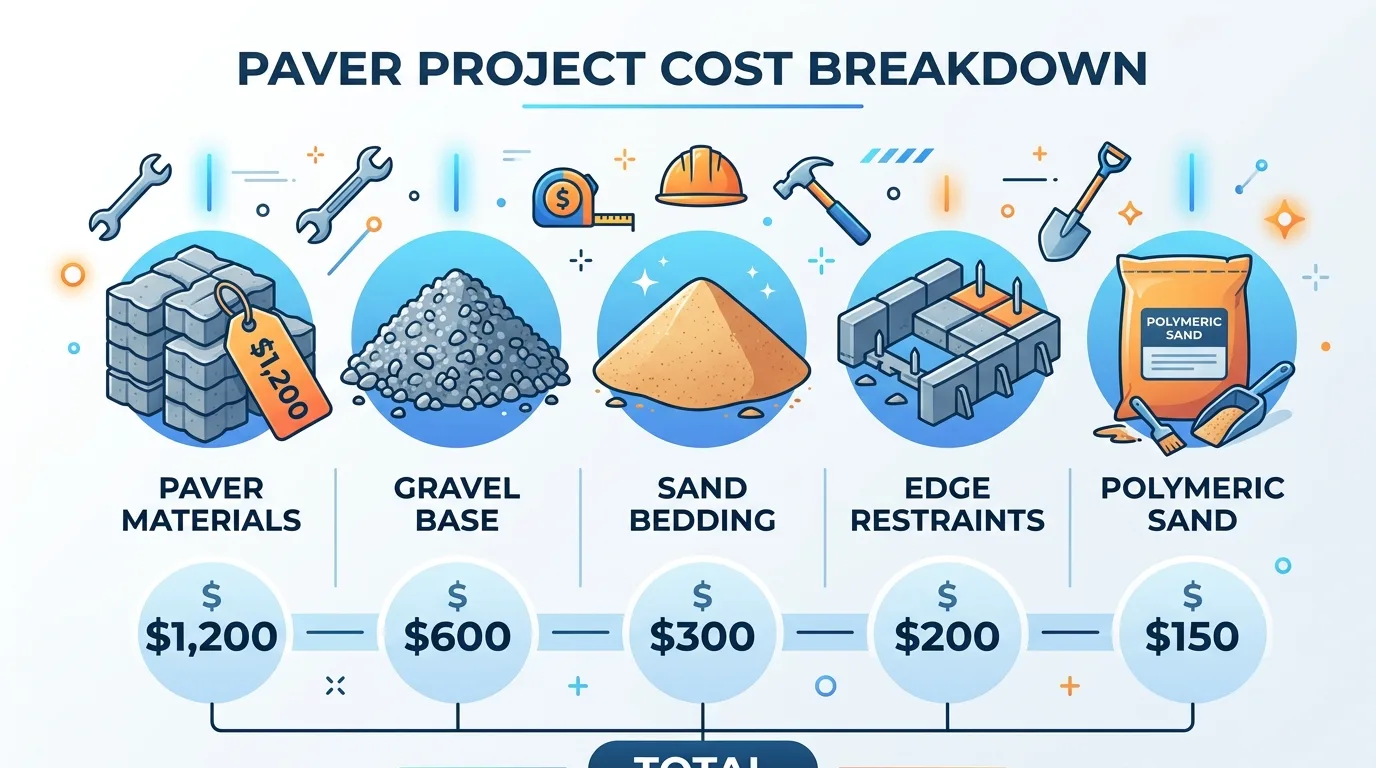
Paver Cost Breakdown
Paver cost depends on the material, size, and whether you hire a contractor or DIY. Here is what to expect in 2026:
| Paver Type | Material Cost / ft² | Installed Cost / ft² | 100 ft² Total (DIY) |
|---|---|---|---|
| Concrete brick | $2 - $4 | $8 - $15 | $200 - $400 |
| Clay brick | $4 - $8 | $12 - $20 | $400 - $800 |
| Natural stone | $8 - $15 | $20 - $35 | $800 - $1,500 |
| Porcelain | $6 - $12 | $15 - $25 | $600 - $1,200 |
Additional costs to budget for:
- Gravel base: $30-$50 per ton (about $150-$250 for 100 ft²)
- Sand bedding: $25-$40 per ton (about $30-$50 for 100 ft²)
- Edge restraints: $2-$4 per linear foot
- Polymeric sand: $25-$40 per bag (covers about 25 ft²)
- Delivery: $50-$150 per load
How Many Pavers Fit on a Pallet?
Most pavers are delivered by the pallet. Here is how many you get per pallet and how much area each covers:
| Paver Size | Pavers per Pallet | Sq Ft per Pallet | Typical Pallet Cost |
|---|---|---|---|
| 4 x 8 in | 480 - 576 | 107 - 128 ft² | $250 - $600 |
| 6 x 6 in | 400 - 480 | 100 - 120 ft² | $300 - $650 |
| 6 x 9 in | 320 - 400 | 120 - 150 ft² | $350 - $700 |
| 8 x 8 in | 288 - 360 | 128 - 160 ft² | $400 - $800 |
| 12 x 12 in | 180 - 240 | 180 - 240 ft² | $500 - $1,000 |
Worked Example: 12x16 Patio
A 12 x 16 ft patio using 4x8 inch pavers with 1 inch sand and 6 inches gravel base:
| Step | Calculation | Result |
|---|---|---|
| Area | 12 x 16 | 192 ft² |
| Pavers needed | 192 / 0.222 x 1.10 | 946 pavers |
| Sand (tons) | 192 x (1/12) x 100 / 2000 | 0.80 tons |
| Gravel base (tons) | 192 x (6/12) x 100 / 2000 | 4.80 tons |
| Pavers cost ($0.50 each) | 946 x $0.50 | $473.00 |
| Sand cost ($35/ton) | 0.80 x $35 | $28.00 |
| Gravel cost ($40/ton) | 4.80 x $40 | $192.00 |
| Total material cost | — | $693.00 |
This is materials only. Professional installation adds $8-$15 per square foot, bringing the total to $2,400-$3,500 for a 192 ft² patio.
Paver Laying Patterns
The pattern you choose affects both the look of your patio and the amount of waste you generate. Some patterns require more cuts at the edges, which means higher waste and more pavers to order.
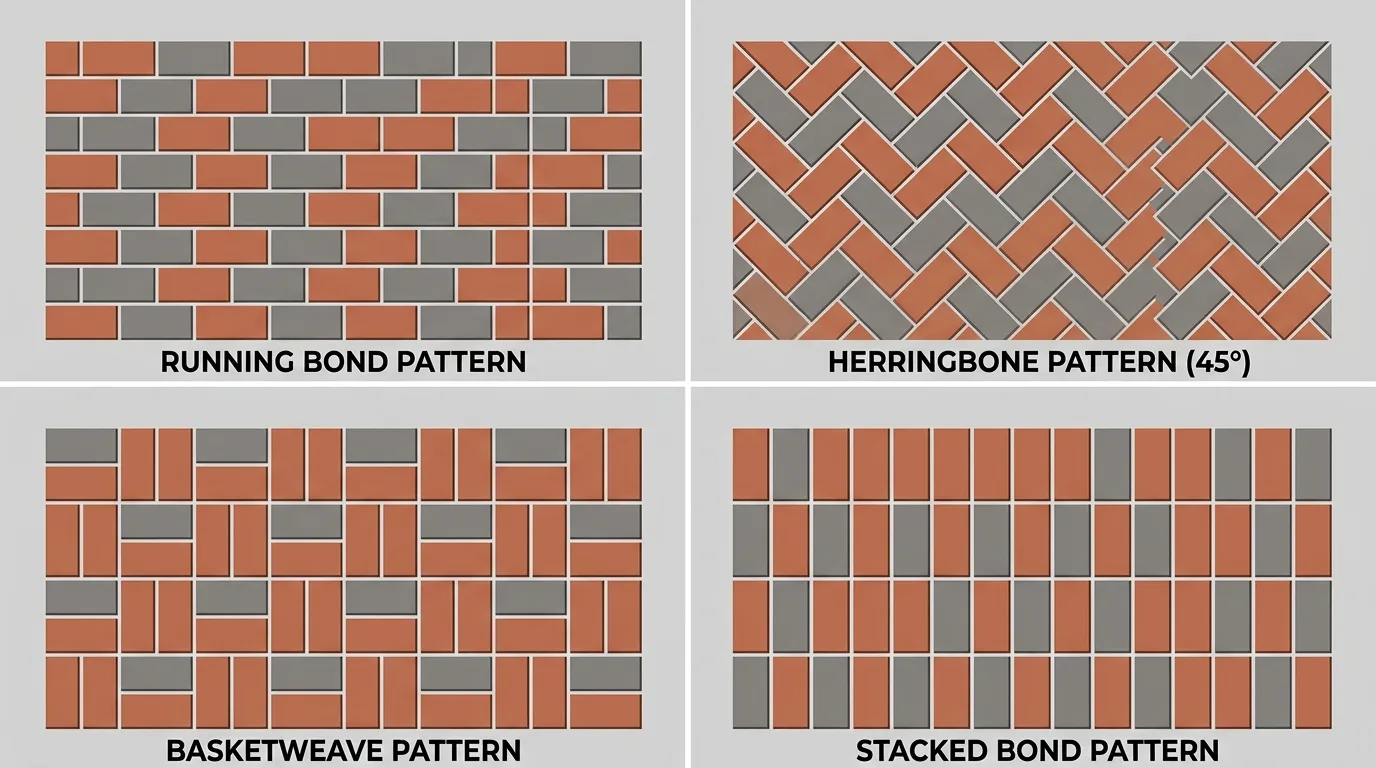
| Pattern | Difficulty | Waste | Best For |
|---|---|---|---|
| Running Bond | Easy | 5-10% | Patios, walkways (most popular) |
| Herringbone | Moderate | 10-20% | Driveways, high-traffic areas |
| Basketweave | Easy | 5-10% | Garden paths, traditional look |
| Stacked Bond | Easy | 5-10% | Modern, clean lines |
| 90° Herringbone | Moderate | 10-15% | Driveways (best interlock) |
| 45° Herringbone | Hard | 15-20% | Driveways, decorative patios |
Running bond is the simplest pattern — each row is offset by half a paver, like bricks in a wall. It requires minimal cutting and works with any paver size.
Herringbone provides the strongest interlock, making it ideal for driveways where vehicles will park. The 45° version looks more dynamic but generates the most waste due to diagonal edge cuts.
Step-by-Step Paver Installation
Proper installation is just as important as getting the right quantity. Here is the standard process for installing pavers on a prepared base:
Dig out the patio area to a depth of 7-10 inches (gravel base + sand + paver thickness). The excavated area should extend 6 inches beyond the planned patio on all sides. Remove all organic material, roots, and loose soil.
Use a plate compactor or hand tamper to compact the exposed soil. This is the foundation of your patio — a poorly compacted subgrade leads to settling and uneven pavers over time.
On soft or clay soils, lay a geotextile fabric over the compacted subgrade before adding gravel. This prevents the gravel from mixing with the soil below and improves long-term stability.
Spread crushed stone (Class 5 or road base) in 2-inch lifts. Compact each lift thoroughly before adding the next. For patios, use 4-6 inches of compacted gravel. For driveways, use 8 inches.
Place two 1-inch pipes on the compacted gravel. Pour concrete sand between the pipes and use a straight board to screed it level. Remove the pipes and fill the gaps. This creates a perfectly level 1-inch sand bed.
Start at a straight edge (house foundation or installed edge restraint). Place pavers gently on the sand bed — do not slide them. Work outward in your chosen pattern. Use string lines to keep rows straight.
Use a wet saw or masonry saw to cut pavers that fit along edges and obstacles. Mark each paver before cutting. Wear safety glasses and hearing protection.
Attach plastic or aluminum edge restraints around the entire perimeter. Secure them with 10-inch spikes driven into the gravel base every 12 inches. This prevents pavers from spreading over time.
Sweep polymeric sand into all joints between pavers. Run the plate compactor over the entire surface to settle pavers into the sand bed and fill joints completely. Add more sand and repeat until joints are full.
Pavers vs Concrete: Which Is Better?
Both pavers and poured concrete create durable outdoor surfaces, but they differ in cost, maintenance, and longevity. Here is how they compare:
| Factor | Pavers | Poured Concrete |
|---|---|---|
| Installed Cost | $8-$15/ft² | $6-$12/ft² |
| Lifespan | 25-50+ years | 20-30 years |
| Crack Resistance | Individual pavers can be replaced | Cracks require full slab repair |
| Maintenance | Low — re-sand joints every 2-3 years | Low — seal every 2-5 years |
| Freeze-Thaw | Excellent — joints allow movement | Prone to cracking in cold climates |
| Repair | Remove and replace individual pavers | Full slab replacement if cracked |
| DIY Friendly | Moderate — no special equipment | Difficult — requires concrete trucks |
| Resale Value | Higher — premium appearance | Standard — functional appearance |
Pavers win on durability and repairability. If a paver cracks or stains, you can remove and replace just that one piece. With concrete, a single crack can mean patching the entire slab or replacing it altogether. In cold climates with freeze-thaw cycles, pavers outperform concrete because the joints allow the surface to flex without cracking.
Concrete wins on upfront cost. If budget is the primary concern and you live in a mild climate, poured concrete is the more affordable option. However, the long-term cost of pavers is often lower because of their longer lifespan and easier repairs.
Freeze-Thaw Considerations
If you live in a region with cold winters, freeze-thaw cycles are the biggest threat to your paver installation. Water freezes, expands, and can shift pavers or crack the base if not properly constructed.
- Use 6-8 inches of gravel base in freeze-thaw zones — the extra depth provides better drainage and prevents frost from reaching the sand bedding layer.
- Choose concrete or clay pavers — both handle freeze-thaw well. Avoid natural stone in extreme cold unless it has low water absorption rates (less than 1%).
- Slope the base slightly (1% grade) to direct water away from the patio. Standing water under pavers is the main cause of frost heave.
- Use polymeric sand in all joints — it hardens when wet and prevents water from infiltrating beneath the pavers.
- Seal the pavers every 2-3 years in harsh climates. A quality sealer reduces water absorption and protects against salt damage.
Frequently Asked Questions
How many pavers do I need for a 10x10 patio?
For a 10x10 ft patio (100 sq ft) using standard 4x8 inch pavers, you need about 450 pavers before waste. Each 4x8 paver covers 0.222 sq ft, so 100 sq ft divided by 0.222 equals 450 pavers. Add 5-10% for cuts and waste.
How much does a pallet of pavers cost?
A standard pallet of 4x8 inch concrete pavers costs $250-$600 depending on color, texture, and brand. A pallet typically contains 480-576 pavers and covers about 100-120 sq ft. Premium or designer pavers can cost $600-$1,200 per pallet.
How deep should gravel be under pavers?
For walkways, use 4 inches of compacted gravel base. For patios, use 6 inches. For driveways, use 8 inches. The gravel should be compacted in 2-inch lifts for maximum stability.
How much sand goes under pavers?
Use exactly 1 inch of concrete sand (ASTM C33) as a bedding layer on top of the compacted gravel base. More than 1 inch allows pavers to shift and rock. Less than 1 inch makes it difficult to level pavers.
What is the best base for pavers?
The best base is 4-6 inches of compacted crushed stone (also called road base or Class 5) topped with 1 inch of concrete sand. The gravel provides drainage and structural support, while the sand creates a level bedding layer.
Can I install pavers over existing concrete?
Yes, you can install pavers over a concrete slab if it is in good condition with no major cracks. Apply a thin layer of sand (1 inch) over the concrete, then lay pavers. However, a proper gravel base is always recommended for drainage and long-term stability.
How long do pavers last?
Concrete pavers last 25-50 years. Clay brick pavers last 25-100 years. Natural stone pavers can last 50-100+ years with proper installation and maintenance. The lifespan depends on the material, climate, traffic, and base quality.
Do pavers need to be sealed?
Sealing is optional but recommended. A quality paver sealer protects against stains, UV fading, and weed growth. Seal every 2-3 years in high-traffic areas or harsh climates. Natural stone pavers benefit most from sealing.
What is the cheapest paver for a patio?
Standard concrete brick pavers are the most affordable at $2-$4 per square foot for materials. Basic gray or tan concrete pavers cost $0.25-$0.50 each. For a 100 ft² patio, expect to spend $200-$400 on materials alone.
Can I install pavers myself or do I need a contractor?
DIY paver installation is possible for small patios and walkways if you have basic tools and physical ability. Driveways and large projects are best left to professionals because they require heavy equipment, precise grading, and proper base compaction. Professional installation costs $8-$15 per square foot.
Data Sources
- Interlocking Concrete Pavement Institute (ICPI) — Paver Installation Guidelines
- The Home Depot — Paver Buying Guide
- Lowe's — How to Install Pavers
- Family Handyman — Paver Patio Step-by-Step
Related Calculators and Tools
- Paver Calculator — Get exact paver count, sand, gravel, and cost for your project
- Sand Calculator — Estimate sand for paver bedding and other projects
- Landscape Rock Calculator — Compare rock vs pavers for your project
- Concrete Slab Calculator — Compare concrete vs paver installation